Manage O-Replay Desktop Client
Installing the Desktop Client in your PC
Results are uploaded using a small program that must be installed on your computer. We provide an installer that works on Windows 11. Simply follow the installer instructions.
Download O-Replay Desktop Client 0.8.6
For older Windows versions, such as Windows 10, you can still try the installer. You might encounter a warning that the program contains malware, but don’t worry, this is due to the absence of a digital signature not because we are a real malware.
If you are using other operating systems, such as Linux or macOS, or if your Windows 10 installation fails, you can still use the client via manual installation.
Managing the Client
Follow the next steps to upload files:
-
Check Connection to Server:
Open the O-Replay Desktop Client and click "Check connection".
-
Login to Event:
Paste the security key (you will get it after creating the event on the web, we will se that later), then click "Enter" and select the stage you want to upload data to. You will get the event Id and security token when you create the event.
-
Upload data to Server:
Choose the directory where you will export files to, then press "Start". The client will now monitor this folder for any
XMLorcsvfiles. When you export start times or results from your timekeeping software, the client will read the file and upload it to O-Replay. Files will be automatically deleted after successful uploads.
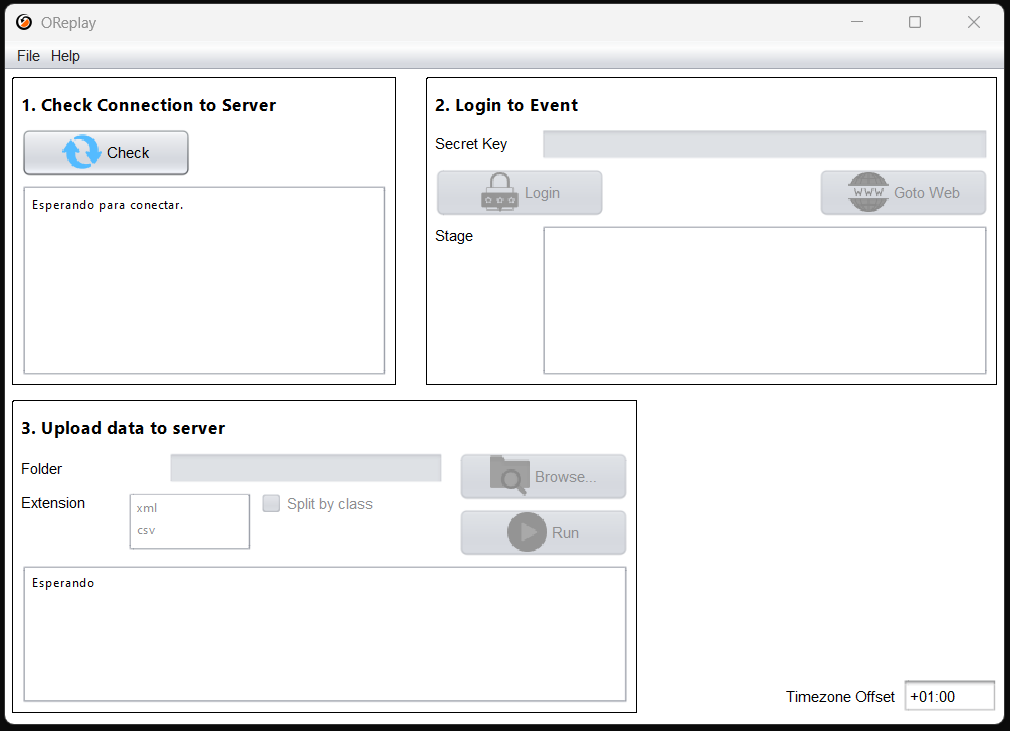
The option "Split by class" makes a different connection to the server for each class. This option is recommended for low-speed or unstable connections.